Deploy RadonDB MySQL Operator and RadonDB MySQL Cluster on KubeSphere
RadonDB MySQL is an open source, cloud-native, and highly available cluster solution based on MySQL database. With the Raft protocol, RadonDB MySQL enables fast failover without losing any transactions.
This tutorial demonstrates how to deploy RadonDB MySQL Operator and a RadonDB MySQL Cluster on KubeSphere.
Prerequisites
- You need to enable the OpenPitrix system.
- You need to create a workspace, a project, and a user for this tutorial. In this tutorial, you log in as
adminand work in the projectdemo-projectin the workspacedemo. If they are not ready, refer to Create Workspaces, Projects, Users and Roles. - You need to enable the gateway in your project to provide external access. If they are not ready, refer to Project Gateway.
Hands-on Lab
Step 1: Add an app repository
-
Log in to the KubeSphere Web console.
-
In
demoworkspace, go to App Repositories under App Management, and then click Create. -
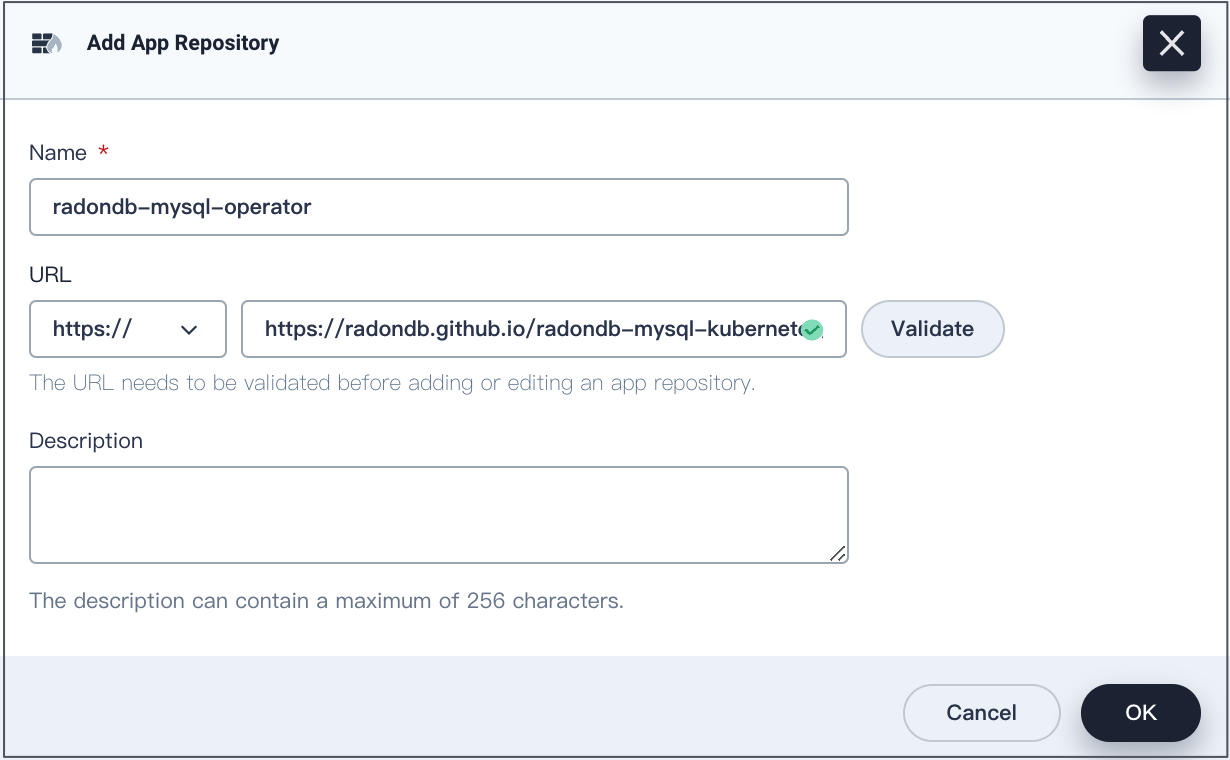
In the dialog that appears, enter an app repository name and URL.
Enter
radondb-mysql-operatorfor the app repository name 。
Enterhttps://radondb.github.io/radondb-mysql-kubernetes/for the MeterSphere repository URL. Click Validate to verify the URL. -
You will see a green check mark next to the URL if it is available. Click OK to continue.
Your repository displays in the list after it is successfully imported to KubeSphere.

Step 2: Deploy RadonDB MySQL Operator
-
In
demo-project, go to Apps under Application Workloads and click Deploy New App. -
In the dialog that appears, select From App Template.
-
On the new page that appears, select
radondb-mysql-operatorfrom the drop-down list. -
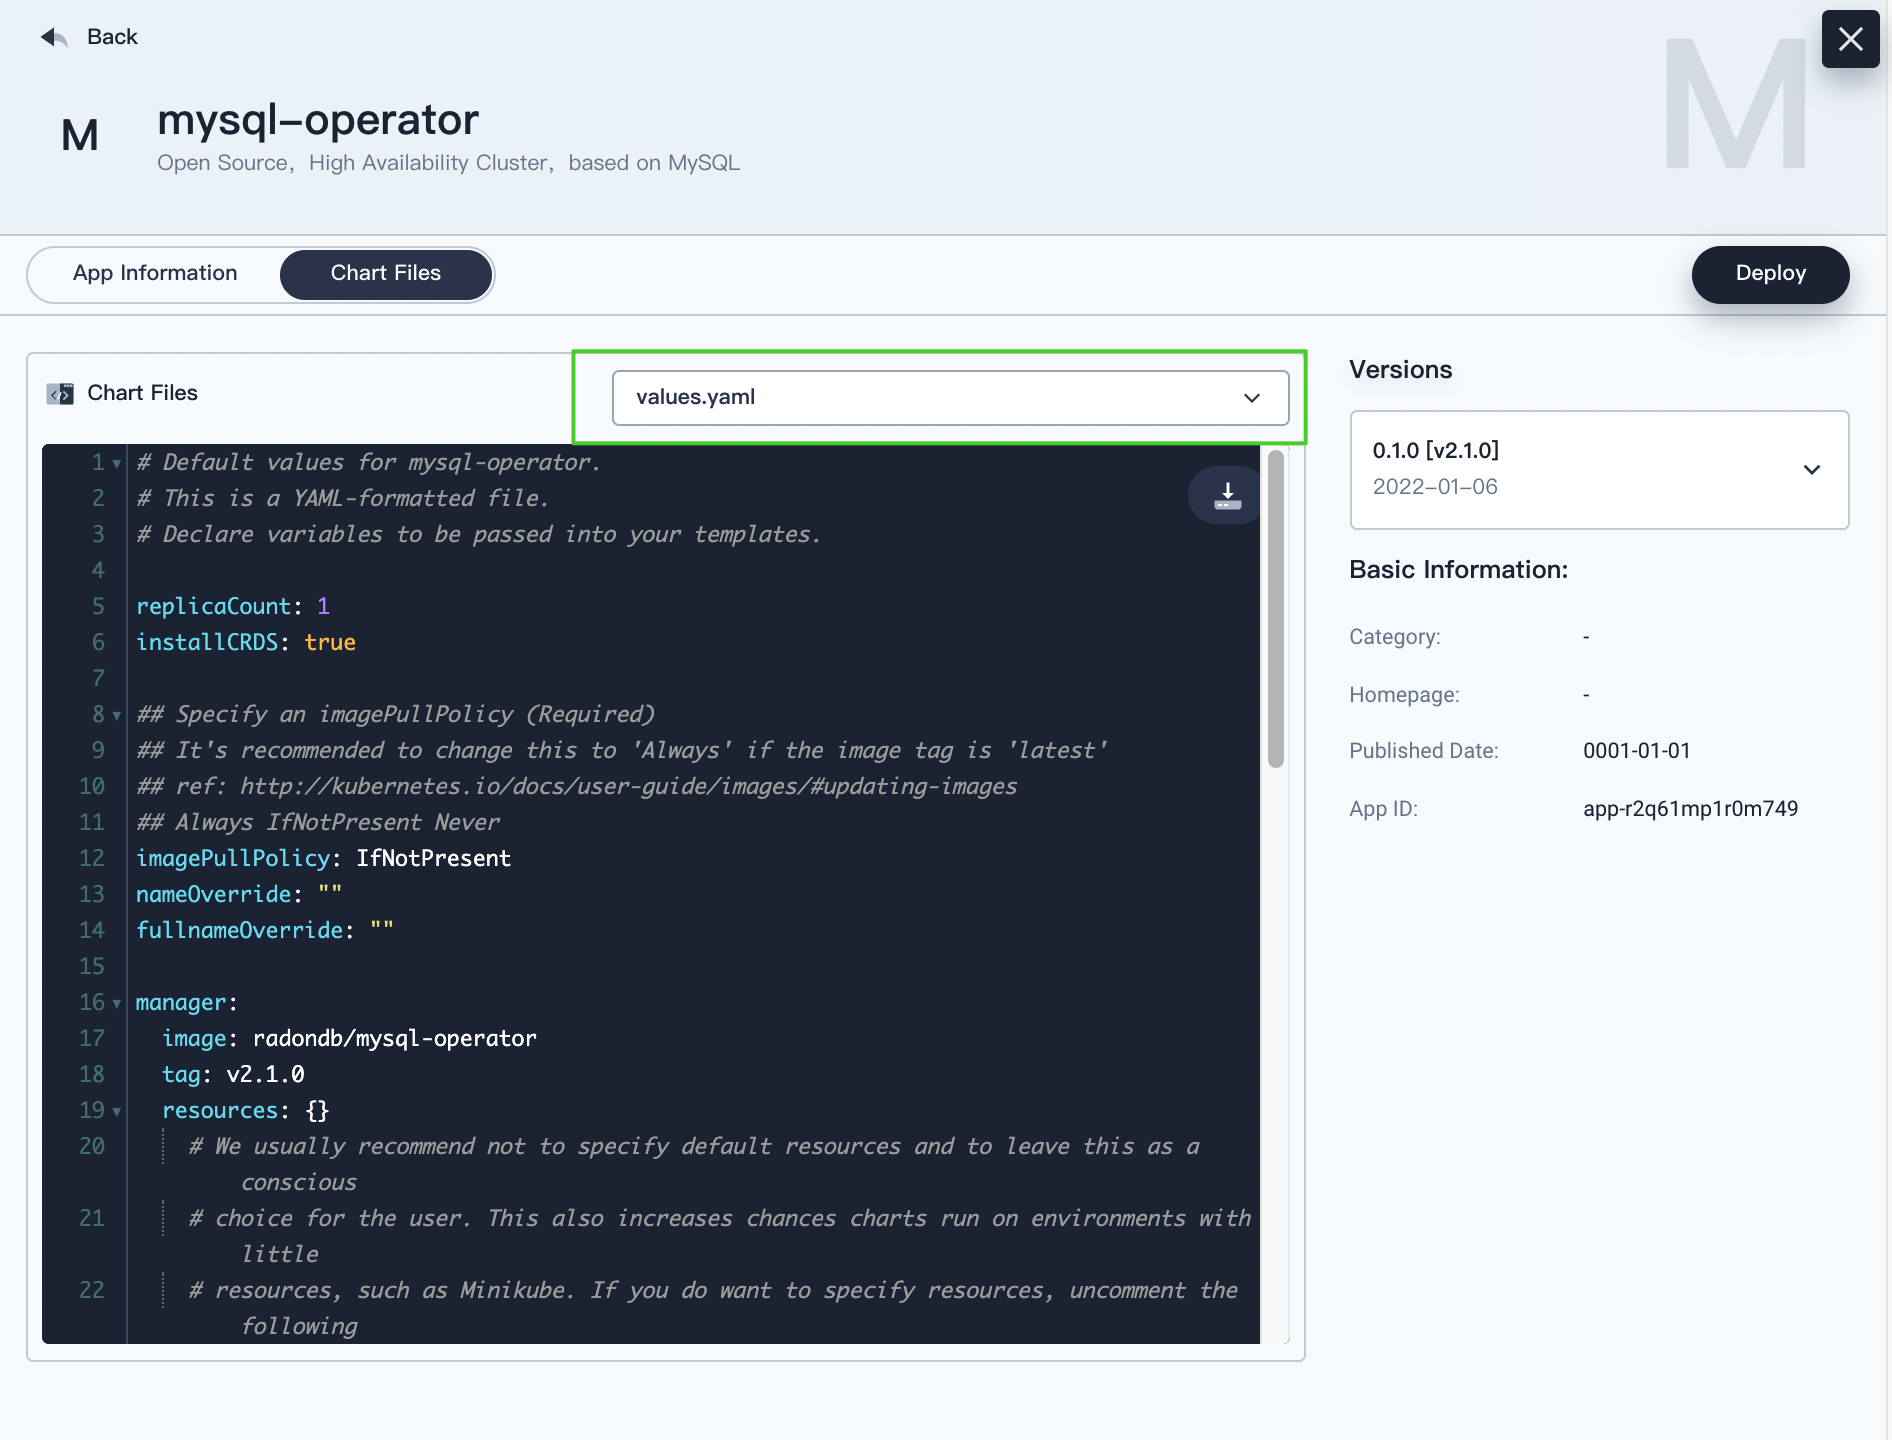
Click clickhouse-cluster, check and config RadonDB MySQL Operator.
On the Chart Files tab, you can view the configuration and edit the
.yamlfiles.
On the Version list, you can view the app versions and select a version.
-
Click Deploy, go to the Basic Information page.
Confirm the app name, app version, and deployment location.
-
Click Next to continue, go to the App Configuration page.
You can change the YAML file to customize settings.
-
Click Deploy to use the default settings.
After a while, you can see the app is in the Running status.
Step 3: Deploy a RadonDB MySQL cluster
You can refer to RadonDB MySQL template to deploy a cluster, or you can customize the yaml file to deploy a cluster.
Take mysql_v1alpha1_mysqlcluster.yaml template as an example to create a RadonDB MySQL cluster.
-
Hover your cursor over the hammer icon in the lower-right corner, and then select Kubectl.
-
Run the following command to install RadonDB MySQL cluster.
kubectl apply -f https://github.com/radondb/radondb-mysql-kubernetes/releases/latest/download/mysql_v1alpha1_mysqlcluster.yaml --namespace=<project_name>Note
When no project is specified, the cluster will be installed in thekubesphere-controls-systemproject by default. To specify a project, the install command needs to add the--namespace=<project_name>field.You can see the expected output as below if the installation is successful.
$ kubectl apply -f https://github.com/radondb/radondb-mysql-kubernetes/releases/latest/download/mysql_v1alpha1_mysqlcluster.yaml --namespace=demo-project mysqlcluster.mysql.radondb.com/sample created -
You can run the following command to view all services of RadonDB MySQL cluster.
kubectl get statefulset,svcExpected output
$ kubectl get statefulset,svc
NAME                            READY   AGE
statefulset.apps/sample-mysql   3/3     10m

NAME                           TYPE        CLUSTER-IP      EXTERNAL-IP   PORT(S)    AGE
service/default-http-backend   ClusterIP   10.96.69.202    <none>        80/TCP     3h2m
service/sample-follower        ClusterIP   10.96.9.162     <none>        3306/TCP   10m
service/sample-leader          ClusterIP   10.96.255.188   <none>        3306/TCP   10m
service/sample-mysql           ClusterIP   None            <none>        3306/TCP   10m
Step 4: View RadonDB MySQL cluster status
-
In
demo-projectproject,go to Services under Application Workloads, you can see the information of services. -
In Workloads under Application Workloads, click the StatefulSets tab, and you can see the StatefulSets are up and running.
Click a single StatefulSet to go to its detail page. You can see the metrics in line charts over a period of time under the Monitoring tab.
-
In Pods under Application Workloads, you can see all the Pods are up and running.
-
In Persistent Volume Claims under Storage, you can see the ClickHouse Cluster components are using persistent volumes.
Usage of the persistent volume is also monitored. Click a persistent volume to go to its detail page.
Step 5: Access the RadonDB MySQL cluster
The following demonstrates how to access RadonDB MySQL in KubeSphere Web console. To access RadonDB MySQL from outside the cluster, please refer to RadonDB MySQL open source project.
Method 1
Go to the demo-project project management page, access RadonDB MySQL through the terminal.
-
Go to Pods under Application Workloads.
-
Click a pod name to go to the pod management page.
-
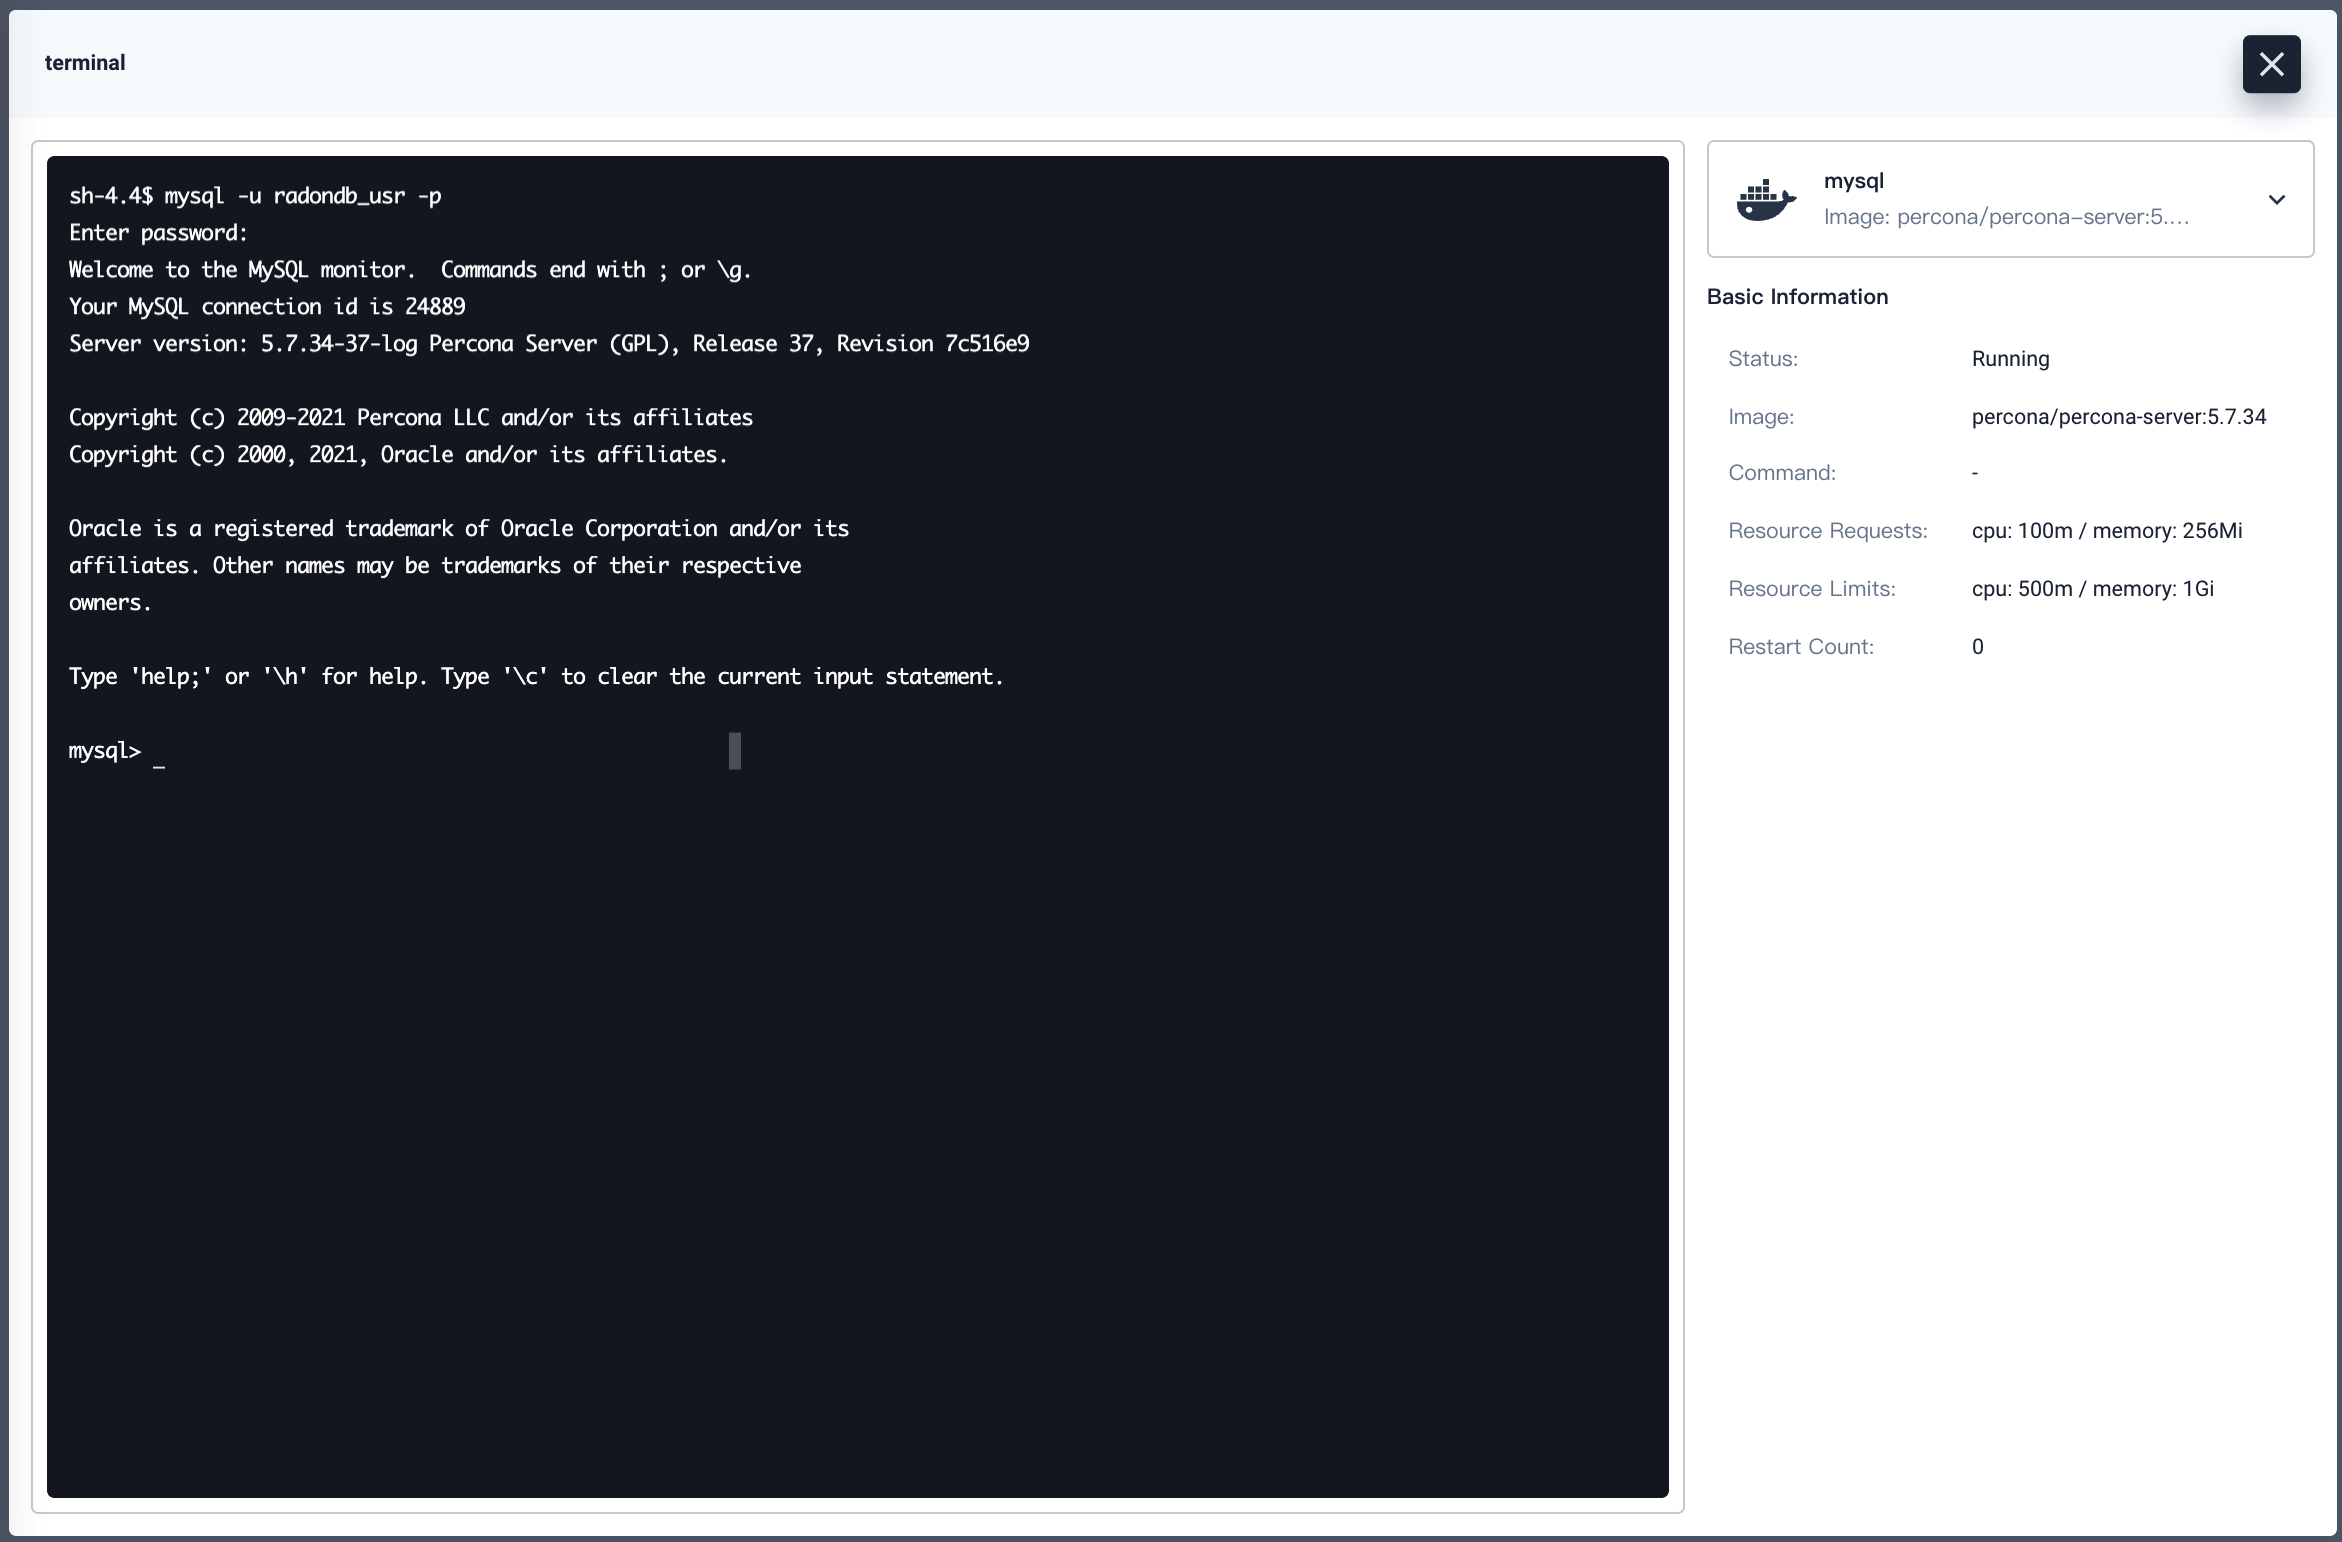
Under the Container column box in Resource Status, click the terminal icon for the mysql container.
-
In terminal window, run the following command to access the RadonDB MySQL cluster.

Method 2
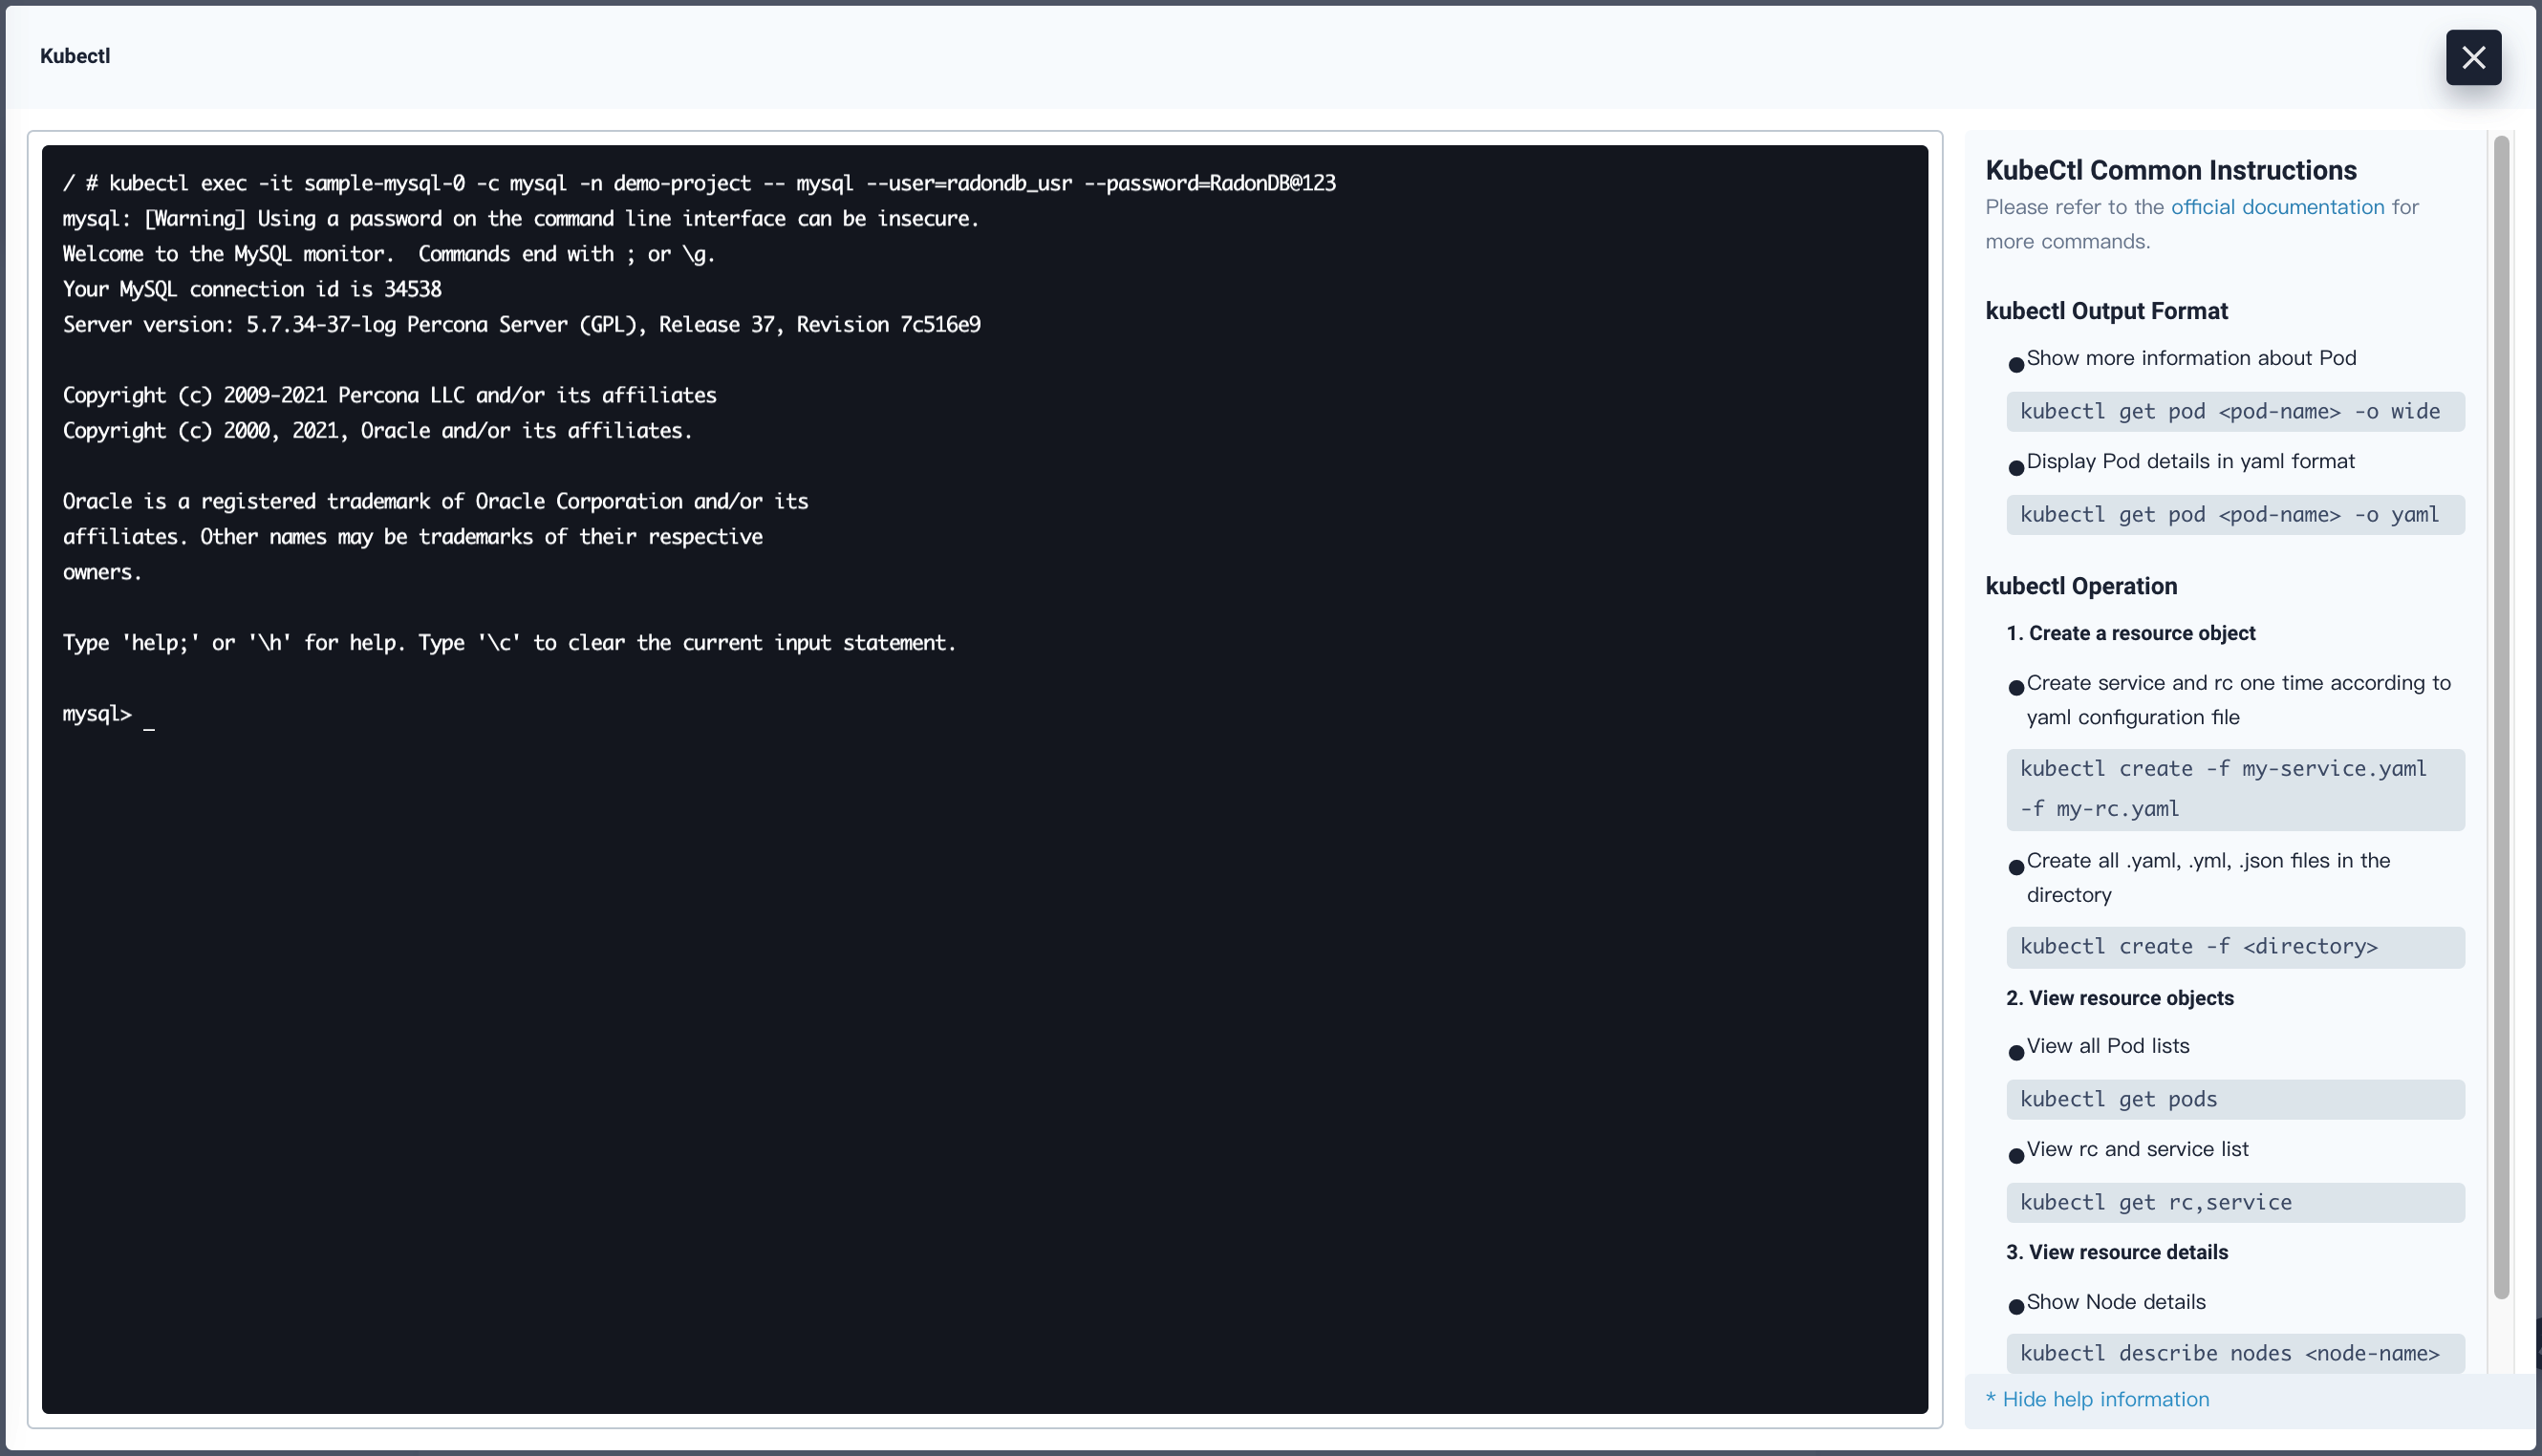
Hover your cursor over the hammer icon in the lower-right corner, and then select Kubectl.
Run the following command to access the RadonDB MySQL cluster.
kubectl exec -it <pod_name> -c mysql -n <project_name> -- mysql --user=<user_name> --password=<user_password>
Note
sample-mysql-0 is the Pod name and demo-project is the Project name. Make sure you use your own Pod name, project name, username, and password.
Feedback
Was this page Helpful?
Receive the latest news, articles and updates from KubeSphere
Thanks for the feedback. If you have a specific question about how to use KubeSphere, ask it on Slack. Open an issue in the GitHub repo if you want to report a problem or suggest an improvement.


 Previous
